Lead like a pro: Proper halter fitting and placement for dairy cattle
 Print
Print Email
EmailA short guide to how show halters should be properly worn and fitted on dairy cattle.
Knowing the proper way for your dairy animal to wear a rope halter can be confusing. Follow the guidelines below to learn how to properly fit your halter to your animal and ensure that the halter is on and worn correctly.
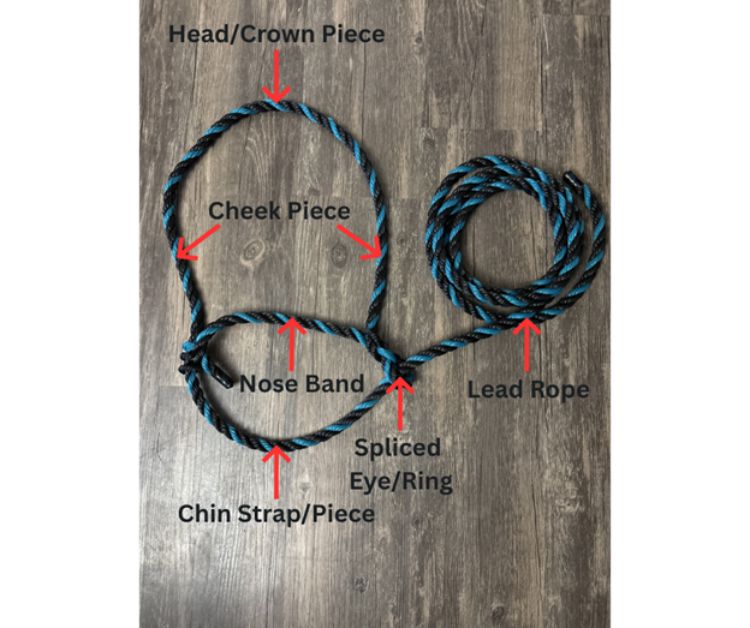
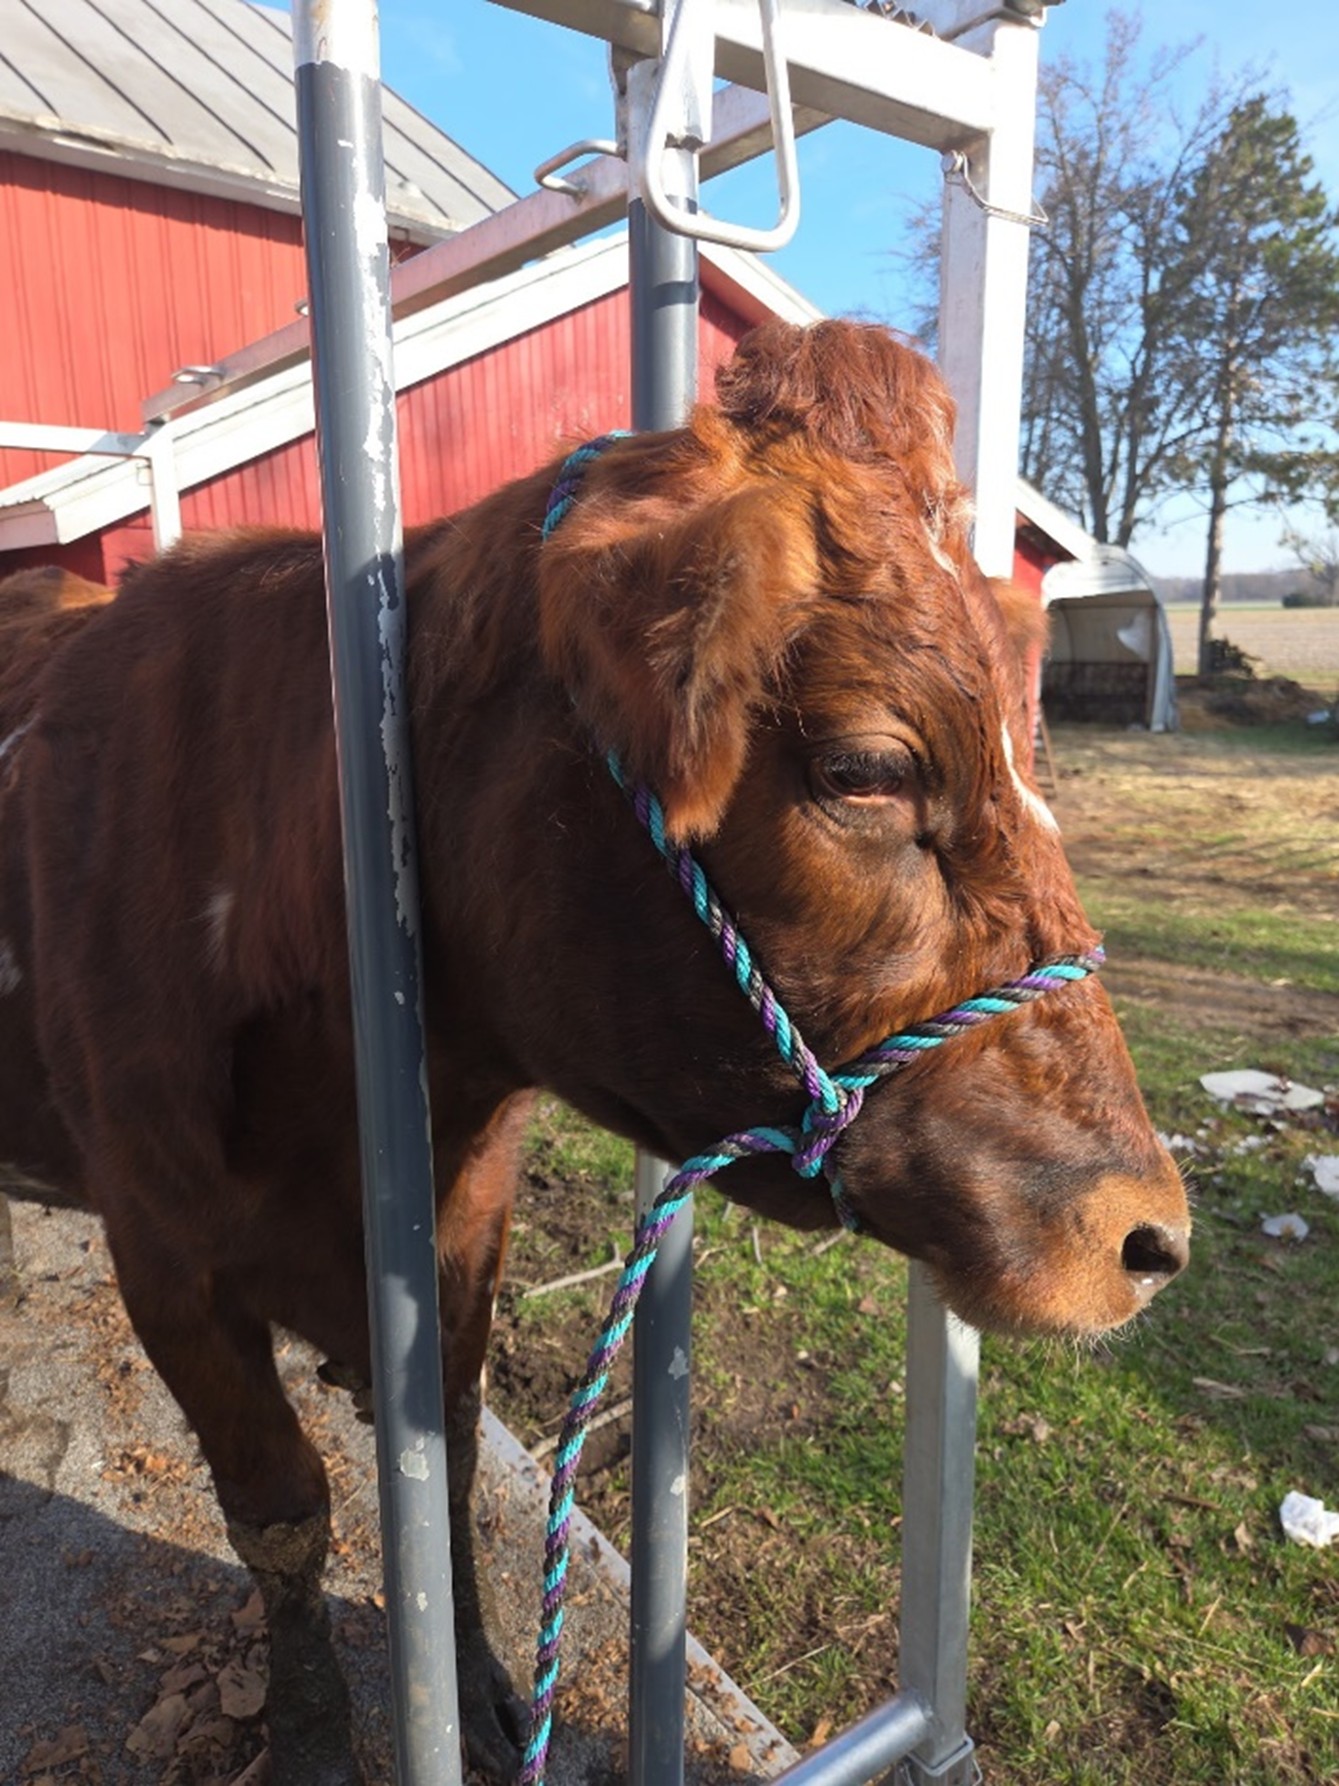
When using a rope halter, be sure to have a halter that is loose and large enough to easily go over both your animal’s ears and nose. Before you start to approach the animal with the halter, you need to identify the following parts of a rope halter: the head/crown piece, nose band, spliced eye/ring, cheek pieces, chin strap/piece and the lead rope.
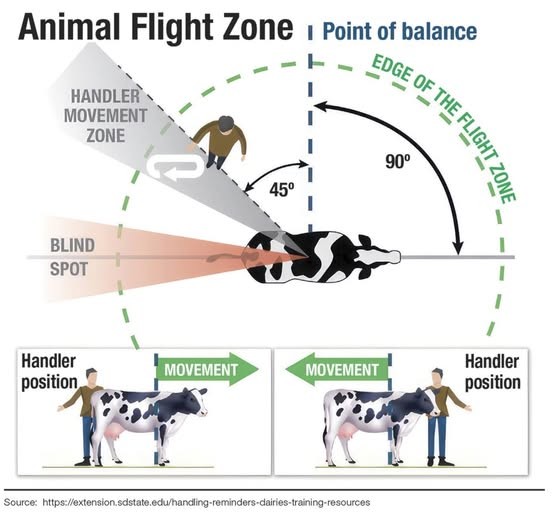
The rope halter should always be worn where the lead rope is on the left side of the animal’s head. Make sure that you are on the animal’s left side before trying to place the halter on the animal. You should be at or just behind the animal’s shoulder to adhere to their point of balance and their flight zone. If you approach the animal from the front, they are likely to turn and go in the opposite direction. You should approach the animal at a slow, quiet and calm pace while remaining in the neutral flight zone area in proximity to the animal.
For best results, place the head/crown piece of the halter in your right hand and keep the lead rope from either touching the animal or dragging on the ground. This can be done by keeping the lead rope in your left hand. Some people also find success by keeping the lead rope in their right hand along with the head piece. You may wish to begin by placing the animal’s nose through hole between the nose band and the chin strap, and then swing the crown piece over the calf’s ears. Then, use the lead rope to tighten the slack under the chin to secure the animal safely into the halter. Ultimately, it is important to find a process that works best for you while enabling you to put the halter on correctly and safely.
After the halter is securely on your animal, it is time to evaluate the halter and ensure that it is on and fitted properly to your animal. The head/crown piece should be placed over both ears and rest between the base of the ears and the neck of the animal. To ensure that the halter isn’t too tight on the animal’s head and that the halter is comfortable and flexible, you should be able to slip four fingers under the head/crown piece while the animal is wearing the halter.
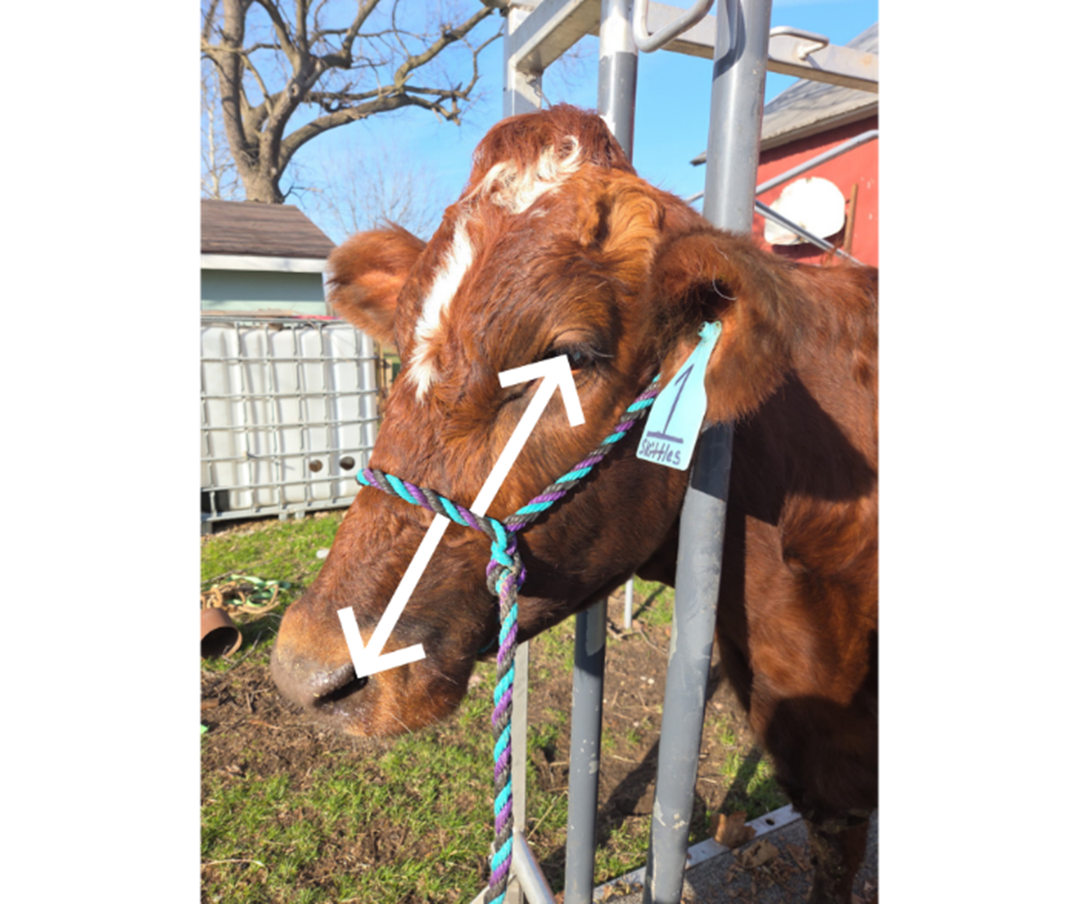
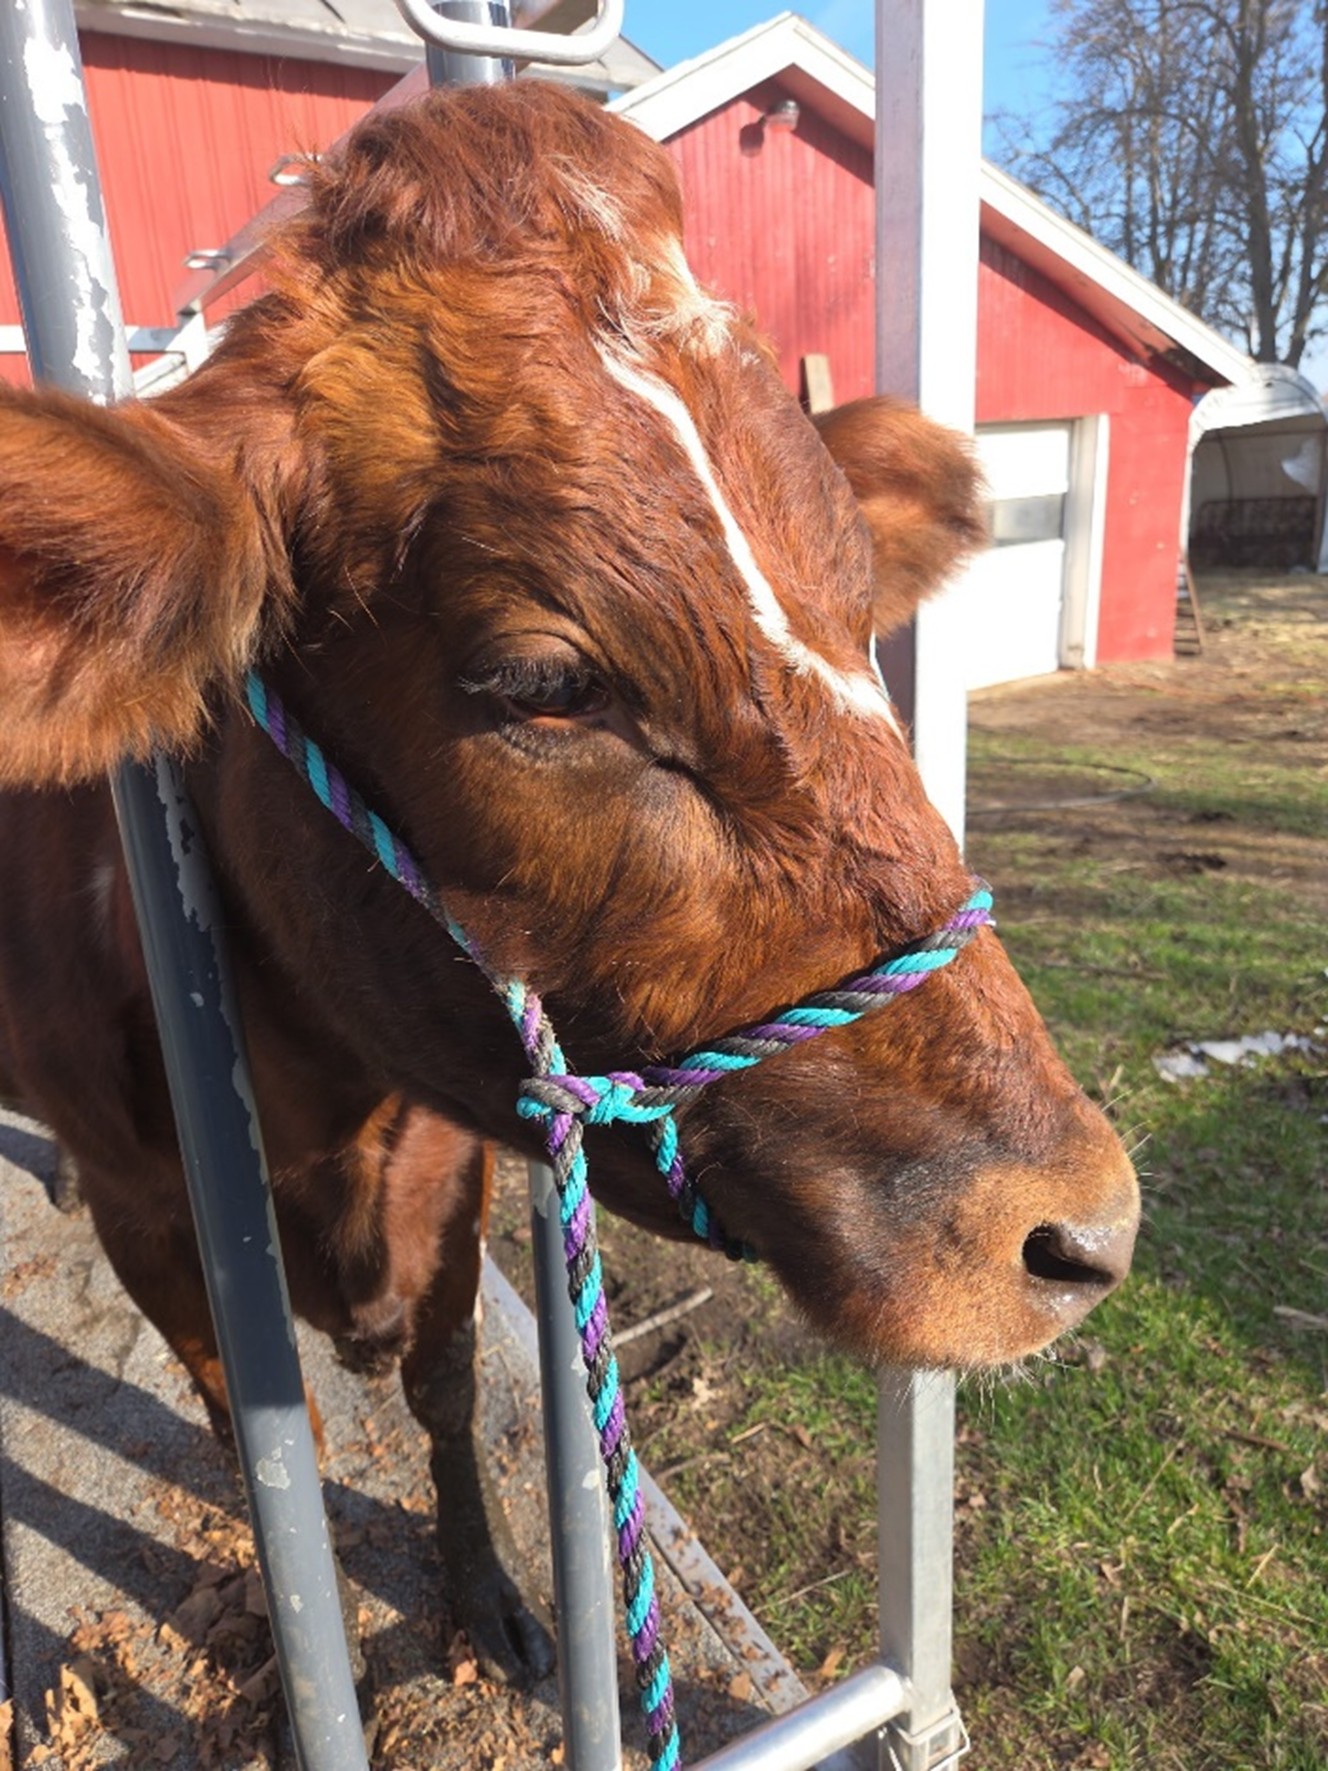
The nose band is the only fixed part of the halter and should be halfway between the nostril and the eye of the animal. When the nose band is too high on the animal’s nose, it can cause discomfort for the animal and result in a loss of control. When the nose band is too low on the animal’s nose, it can pinch and squeeze the airways and restrict the animal’s ability to breathe properly. Both wrong placement scenarios lead to added stress for both the animal and the handler. Additionally, mis-fitting halters can cause discomfort for the animal, as it puts unnecessary pressure on their jaw. In both scenarios, animals may be resistant to moving because of the discomfort caused by misplacement of the nose band.
The chin strap/piece should be completely under the jaw of the animal, allowing for the shortening or lengthening of the lead rope through the spliced eye/ring. The chin strap/piece and lead rope slide back and forth through the spliced eye/ring to provide extra space and comfort for the animals to chew their cud, eat, drink, yawn or perform other necessary jaw movements.
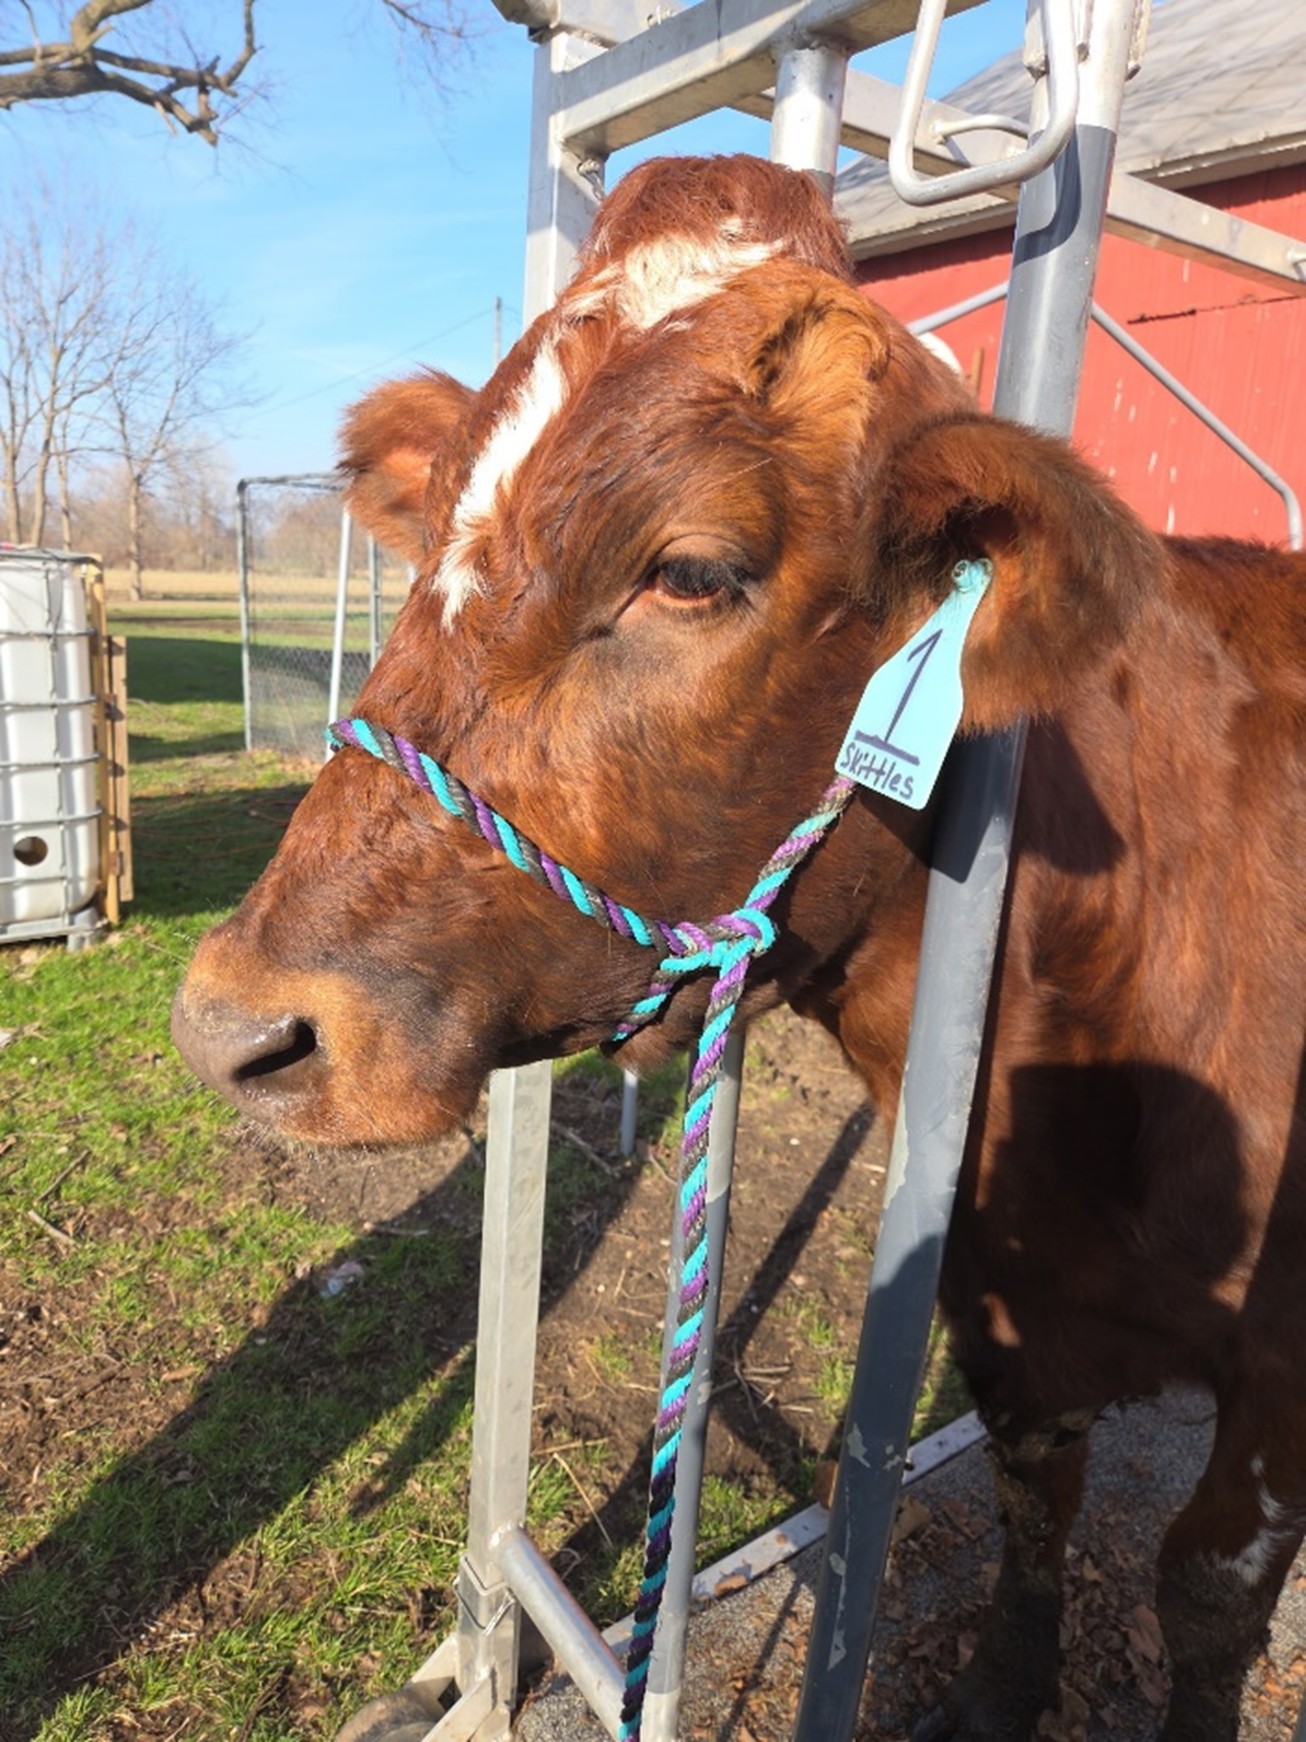
Below you will find examples of incorrect ways halters may be placed on a dairy animal.
It is important to ensure that rope halters are fitted and worn properly, for the safety of both people and animals. By following these steps and diagrams, the animal will be the most comfortable and safety will be at the forefront of your 4-H animal project.
For those interested in learning more about 4-H dairy programs or opportunities to get involved, contact your local Michigan State University Extension office.