Backing Up Content from Your Windows 7 Computer
 Print
Print Email
EmailInstructions for backing up content from your Windows 7 computer prior to upgrading to Windows 10.
It is recommended that you transfer files to an external drive; however, files can also be copied into OneDrive if necessary.
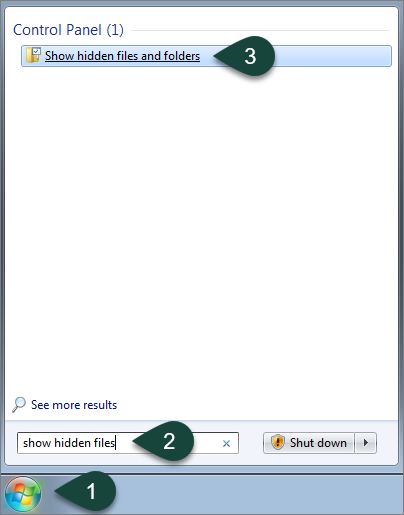
- Select the Start Button.
- Enter Show Hidden Files in the search bar at the bottom of the Start Menu.
- Select Show Hidden Files and Folders. This will open the Folder Options menu.
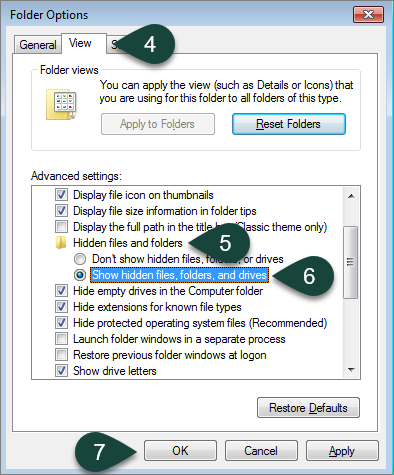
- Select the View Tab.
- Scroll to Hidden Files and Folders.
- Select Show Hidden Files, Folders, and Drives.
- Select Ok.
- Select the Start Button.
- Enter Windows Explorer in the search bar.
- Select Windows Explorer.

- Plug in the External Device you wish to copy your files to.
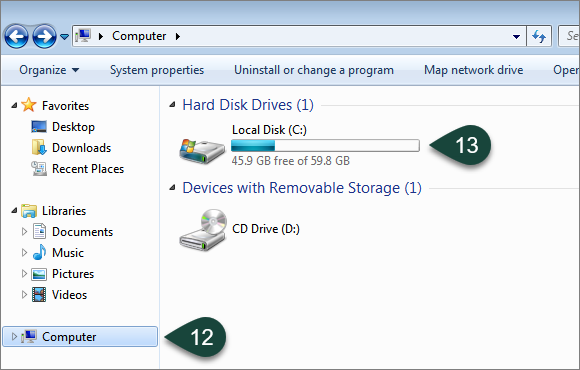
NOTE: After installation, the drive will appear in the Computer section. - Select Computer.
- Select Local Disk.
- Select Users.
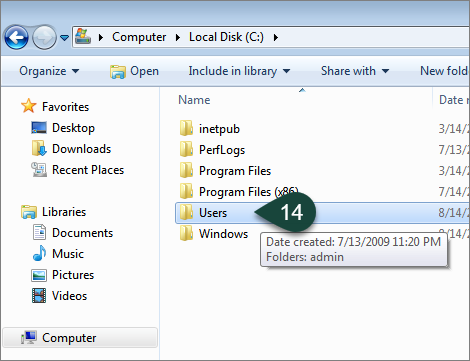
- Select your Username/Current Login from the list.
NOTE: There may be more than one user listed in this screen.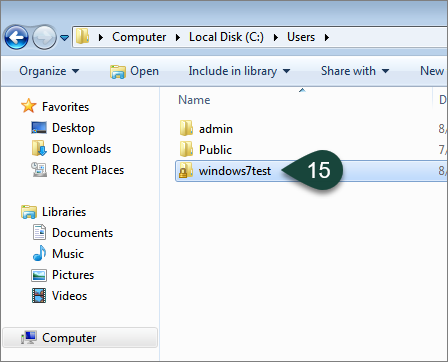
- Hold down the Control (Ctrl) key and select Each of the Following Folders:
- AppData
- Desktop
- Favorites
- My Documents
- My Music
- My Pictures
- My Videos
- Ensure each folder is Highlighted in Blue to indicate it is selected.
- Right Click on any highlighted folder.
- Select Copy.
NOTE: This can also be accomplished by holding the Control (Ctrl) key and selecting the C key.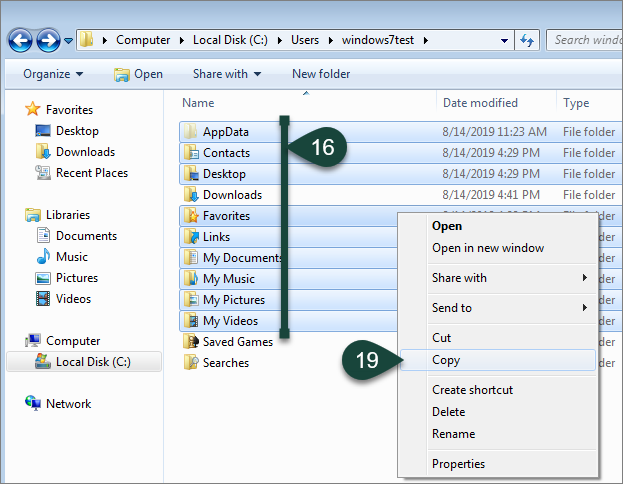
- Select the External Drive.
- Right Click on the space available for files.
- Select Paste.
NOTE: This can also be accomplished by holding the Control (Ctrl) key and selecting the V key.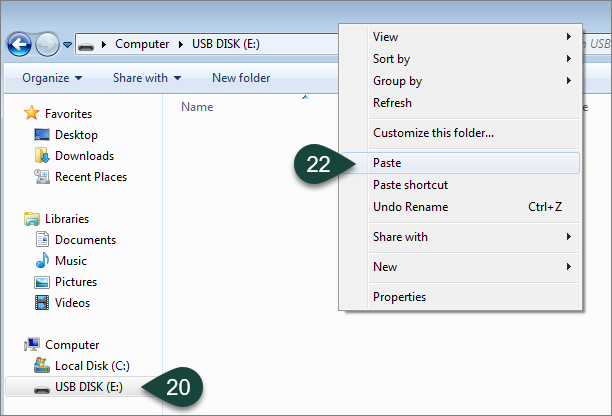
- The copy progress will display in a pop up window. This window will disappear when the copy is completed.
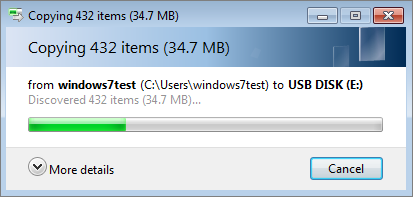
- Verify all the files copied correctly.
- Right Click the external device.
- Select Eject to safely remove the device.
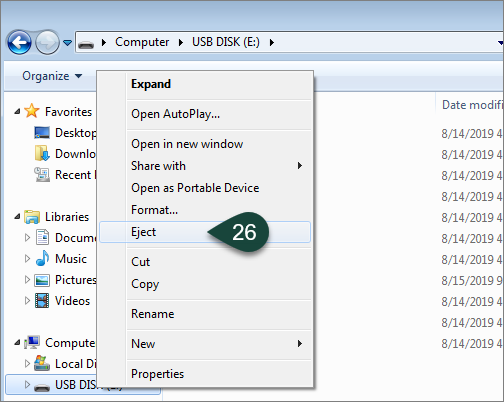
- If the computer states the device is Still in Use, close all applications and attempt to Eject the device again or shut down the computer and then remove the device.