


Winter wheat greenup and management decisions
 Print
Print Email
EmailWhat is greenup of winter wheat and what management should you be considering at this point?
What is greenup?
First, let’s understand wheat growth and development. After winter wheat is planted in the fall, it germinates and begins to grow. Ideally, wheat is planted early enough for the crop to reach four to five tillers produced in the fall. As temperature cools in the fall, wheat hardens off and goes dormant over the winter months. The cold period is required for vernalization to occur, a critical step needed to induce reproductive growth in the spring. For more on what occurs to wheat in fall, check out this article from Michigan State University Extension on wheat emergence and vernalization.
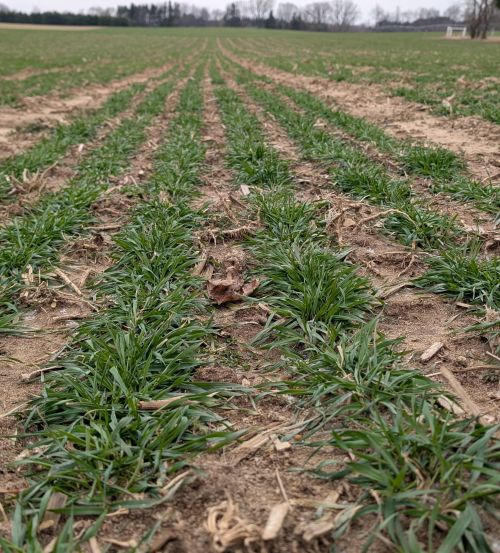
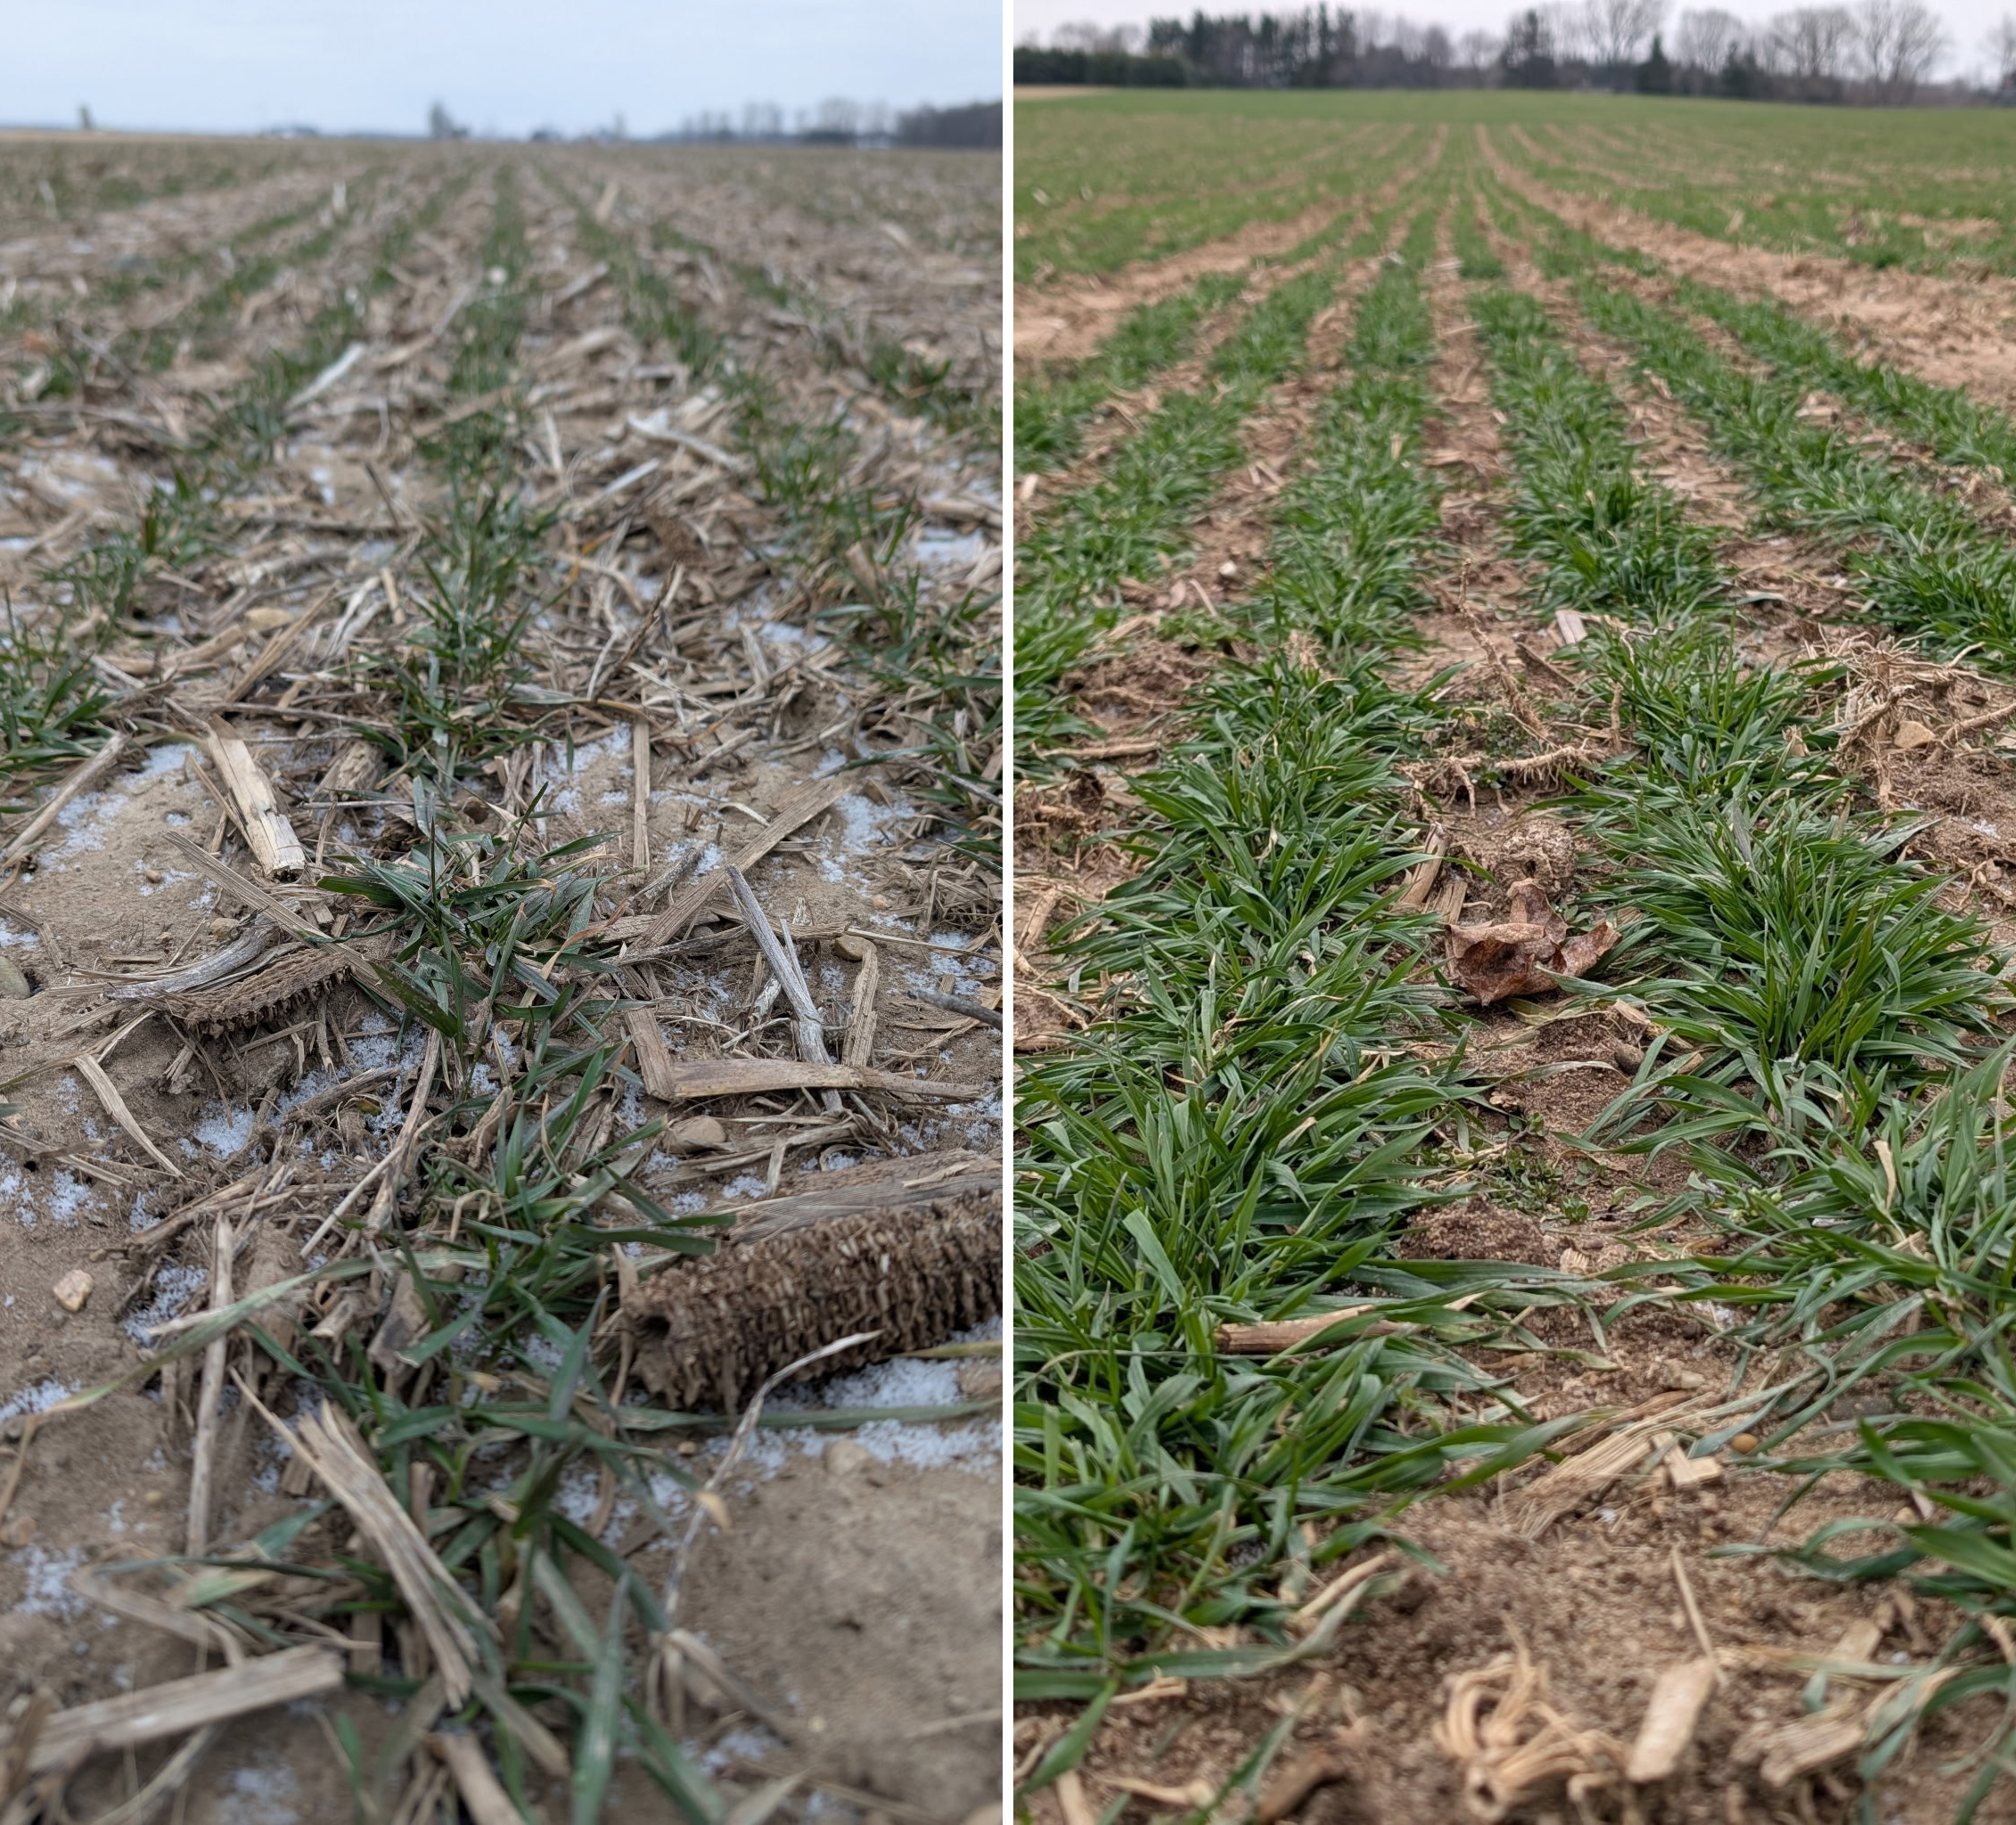
As temperatures warm and daylength increases in the spring, wheat will break dormancy, green up (appear a darker green) and begin to grow. Greenup is not a growth stage but rather a description of what is going on in the field. In Michigan, greenup typically occurs at Feekes 3-4. The growing point remains below the soil surface until Feekes 6, which typically occurs between mid-April and the first part of May across much of Michigan, which helps the wheat tolerate those early season temperature swings.
There are a couple rules of thumb for determining when wheat will break dormancy and when it will green up and start to grow. First, warming to a soil temperature of 48 degrees Fahrenheit is an indicator that wheat may have broken dormancy. Second, seven consecutive days with growing degree days (GDD) above zero is also an indicator that wheat has broken dormancy.
Generally, these two rules of thumb coincide with each other. After winter wheat has broken dormancy, greenup occurs. Greenup requires seven days in a row where there is at least 5 GDDs each day. In lower Michigan, greenup typically occurs in March, but will vary by location and weather.
GDD is a measurement of heat accumulated that can be used to estimate the growth and development rate of plants and insects and can have different base units depending on what crop you are referring to. To learn more about how to calculate wheat GDDs, watch this video.
Why does greenup matter?
When wheat greens up in the spring, it means that wheat is actively growing again and other things will soon begin. After wheat achieves greenup, we should be actively scouting and taking stand counts. Scouting will help us determine if early season spring herbicide is required, when/how much nitrogen we should be applying and if any winterkill or other stand issues exist.
Just prior to greenup
Clover frost seed considerations
Frost seeding clover is still an option so long as frost and rainfall are in the forecast to work the seed in. Usually this is done on frozen ground to limit damage to the crop, but if field conditions permit, it is still a good idea to frost seed clover. Take a look at the article “Frost seeding red clover into winter wheat” for details on how to frost seed clover. For additional information on cover crop termination, please refer to the Michigan State University Extension bulletin on cover crop termination.
Winterkill
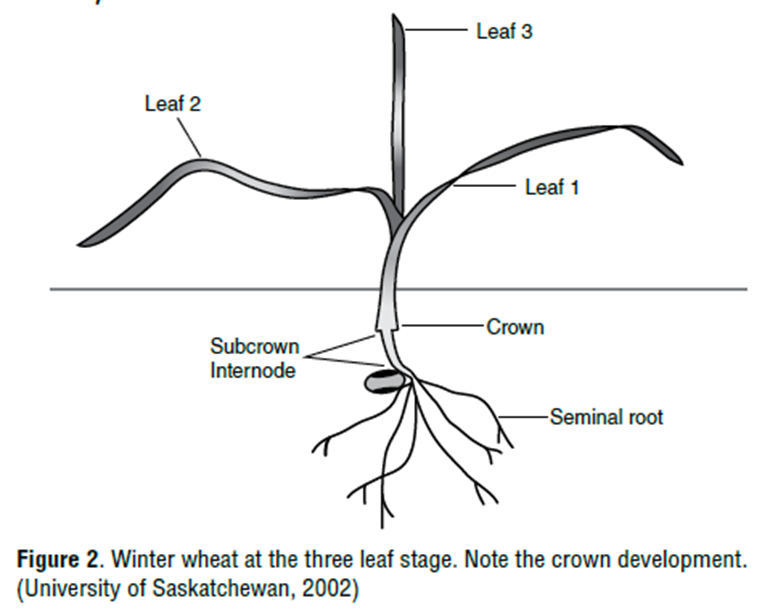
Winterkill, when plants do not make it through the winter alive, can be caused by a variety of things. Winter wheat goes through a vernalization period where the plant hardens and adjusts to the colder winter temperatures. The hardening off period begins in the fall once temperatures at the crown (growing point, generally placed about 1-2 inches below ground surface level) drop below 48 F and continues as the temperature decreases. The hardening process causes a reduction in moisture content in the cells of the crown (see Figure 2 from the Winter Wheat Production Manual), which slows growth processes and the accumulation of soluble carbohydrates, all of which help the plant to resist frost damage.
The hardening process takes place over four to eight weeks and the level of hardiness is directly related to the soil temperature at the crown depth. Daylength also impacts hardiness, as shortening days in the fall induce wheat winter hardiness. Conversely, longer days in the spring bring wheat out of hardiness.
Winter hardiness is dynamic, and when soil temperatures fluctuate, plants may be less able to tolerate cold temperatures if conditions cool after a warm period. If the crowns of the plants are exposed to warmer temperatures for as little as 50 hours, the cold hardiness can be decreased substantially, according to Fowler, 1982.
The loss of cold tolerance has two major implications:
- If soil temperature decreases below the current level of winter hardiness, injury will occur.
- Once a crop loses winter hardiness, it will never reach the original level of hardiness and it will de-harden more quickly each time the soil temperature rises above the minimum survival temperature.
Soil temperature is a good estimate of the crown temperature when evaluating potential risk of winterkill from cold temperatures on wheat. A phyllochron is the interval of time it takes for a new leaf (tiller) to develop. It generally takes about 100-120 GDDs per phyllochron; early planting requires more GDDs per phyllochron than later planted wheat. GDDs for wheat development are calculated differently than for corn or other crops. For wheat, the number of GDDs is calculated using degrees Celsius with a base temperature of 0. Simply, it is the average of the daily high and low temperatures. For example, if the low is 0 C and the high is 10 C, the GDD for that day is 5 [(0+10)/2].
Another cause of winterkill is ice damage. This can occur when warm temperatures melt much or all of the snow quickly or additional rainfall caused water ponding in spots in the field. If temperatures cool below freezing before the water has a chance to drain, you can get icing of the ponded spots. For an established wheat crop to suffer damage from ice, previous research has shown that a minimum of 10 to 40 days of ice surrounding the leaves is necessary.
Ice generally damages plants by sealing leaves, stems and buds from the surrounding air, creating an anaerobic environment. When ice surrounds the crown of wheat for long periods of time, it allows toxic metabolites resulting from this anaerobic environment (ethanol and carbon dioxide) to build up, preventing the natural gas exchange that occurs during respiration. In other words, it “suffocates” the plants. Still, for suffocation to occur, a long period of ice-covered leaf surface is needed.
Spring stand counts and stand evaluation
Crop scouting efforts should really occur after greenup begins. However, if you suspect you have winter injury or if you just want to confirm that your plants did survive the winter, there is a “bag test” that can be done. This test can be used to get an early indication of survival. If you have injury, there are some general guidelines to help determine if you should reseed or tear up the seeding to plant another crop. Optimum plant stand is 25 plants per square foot (16 plants per foot of row if 7.5-inch rows). A general rule of thumb is that 50% or more of the optimum stand is adequate. In areas of the field with reduced stands, tillering will help fill in the gaps.
Bag test for determining winter kill
- Carefully dig wheat plants from different parts of the field with a spade. Remove up to 3 inches of soil containing the plant crown and roots.
- Thaw the samples at room temperature.
- Wash with cold water to remove soil from the roots.
- Cut leaves about 1.5 inches from the crown and roots just below the crown.
- Rinse crown with clean, cool tap water.
- Place at least five crowns in a plastic freezer bag, inflate and tie shut.
- Place bag in a lighted room but not in direct sunlight.
- After five to seven days, a healthy crown should show 0.5 inch or more of new growth.
- Plants that are not growing after six days are assumed to be dead.
Scouting procedure
You cannot scout fields from your pickup. Get out and walk each field and conduct a set of stand counts that represents the entire field. When conducting stand counts, make sure to:
- Measure 3 feet of row.
- Count and record the number of plants.
- Calculate the average number of plants per foot.
- Count in three to five locations per field.
It is important to count plants in 3 feet of row as wheat is too variable if you only count 1 foot. Use a yard stick and lay it down next to a row and begin counting. Try not to purposely count only good or bad areas as you want to get a good average in order to make proper management decisions. Count 3 foot of row in three to five locations in each field and use the average to determine the plant stand per 1 foot of row. For stand counts, only count live plants, not tillers. However, make note of how many tillers you have per plant as that will help you adjust nitrogen (N) timing. Reference Table 1 for an estimation of yield potential based on plant stand counts.
Table 1. Plant stand counts for four row spacings and their relation to percent of yield potential. Adapted from Table 3-4 of the University of Kentucky Extension Bulletin ID-125, "A Comprehensive Guide to Wheat Production in Kentucky."
|
Plants per foot |
Percent of yield potential |
|||
|---|---|---|---|---|
|
6-inch rows |
7-inch rows |
7.5-inch rows |
10-inch rows |
|
|
12-14 |
14-16 |
15-18 |
20-23 |
100 |
|
9-11 |
11-13 |
11-14 |
15-19 |
90-95 |
|
8-9 |
9-11 |
9-10 |
13-14 |
75-80 |
|
6-7 |
7-8 |
8-9 |
10-12 |
60-70 |
|
3-6 |
4-6 |
4-7 |
5-9 |
40-50 |
Early season nitrogen management
Degree of tillering is a useful tool for determining the timing of spring nitrogen applications in wheat. Ideally, wheat should produce four to five tillers in the fall, as fall tillers typically have greater yield potential than those formed in spring. In fields with four to five tillers, a single nitrogen application at Feekes 5-6 (just prior to first node) should produce reasonably good yields. In fields with less than four tillers, a split nitrogen application is recommended. Apply 40% of the nitrogen at greenup and the remainder at Feekes 6 (after jointing begins), based on yield goals.
If you want to ratchet yields up, a split application will improve the ability to meet the nitrogen demands of the crop. In this case, if you have adequate tillering at greenup, apply 40% of your nitrogen just after greenup occurs. Put the remainder on at Feekes 6. If tillering is low, bump the early application to 60% of your nitrogen with the remainder at Feekes 6. If you use Urea Ammonium Nitrate (UAN), remember 25% of the nitrogen is already in the nitrate form.
Table 2 contains Michigan State University Extension fertilizer recommendations for nitrogen rates on wheat based on yield goal. Be sure to use a realistic yield goal considering the current crop condition.
Table 2. Recommended nitrogen rates for winter wheat based on the formula N = (1.33 x yield potential) - 13.
|
Yield potential (bu/a) |
Nitrogen (lbs/a) |
|
60 |
67 |
|
70 |
80 |
|
80 |
93 |
|
90 |
107 |
|
100 |
120 |
|
110 |
133 |
|
120 |
147 |
Scouting for weeds
Which fields are more likely to have pressure?
Late-planted wheat with little or no tillering may be subject to increased weed pressure. The lack of early canopy cover may allow winter annuals to germinate and get a foothold whereas timely planted wheat may be able to overcome and outcompete these weeds. When conducting stand counts, make note of weed pressures and determine a timely weed control plan.
Which weeds are most likely to be appearing at this stage?
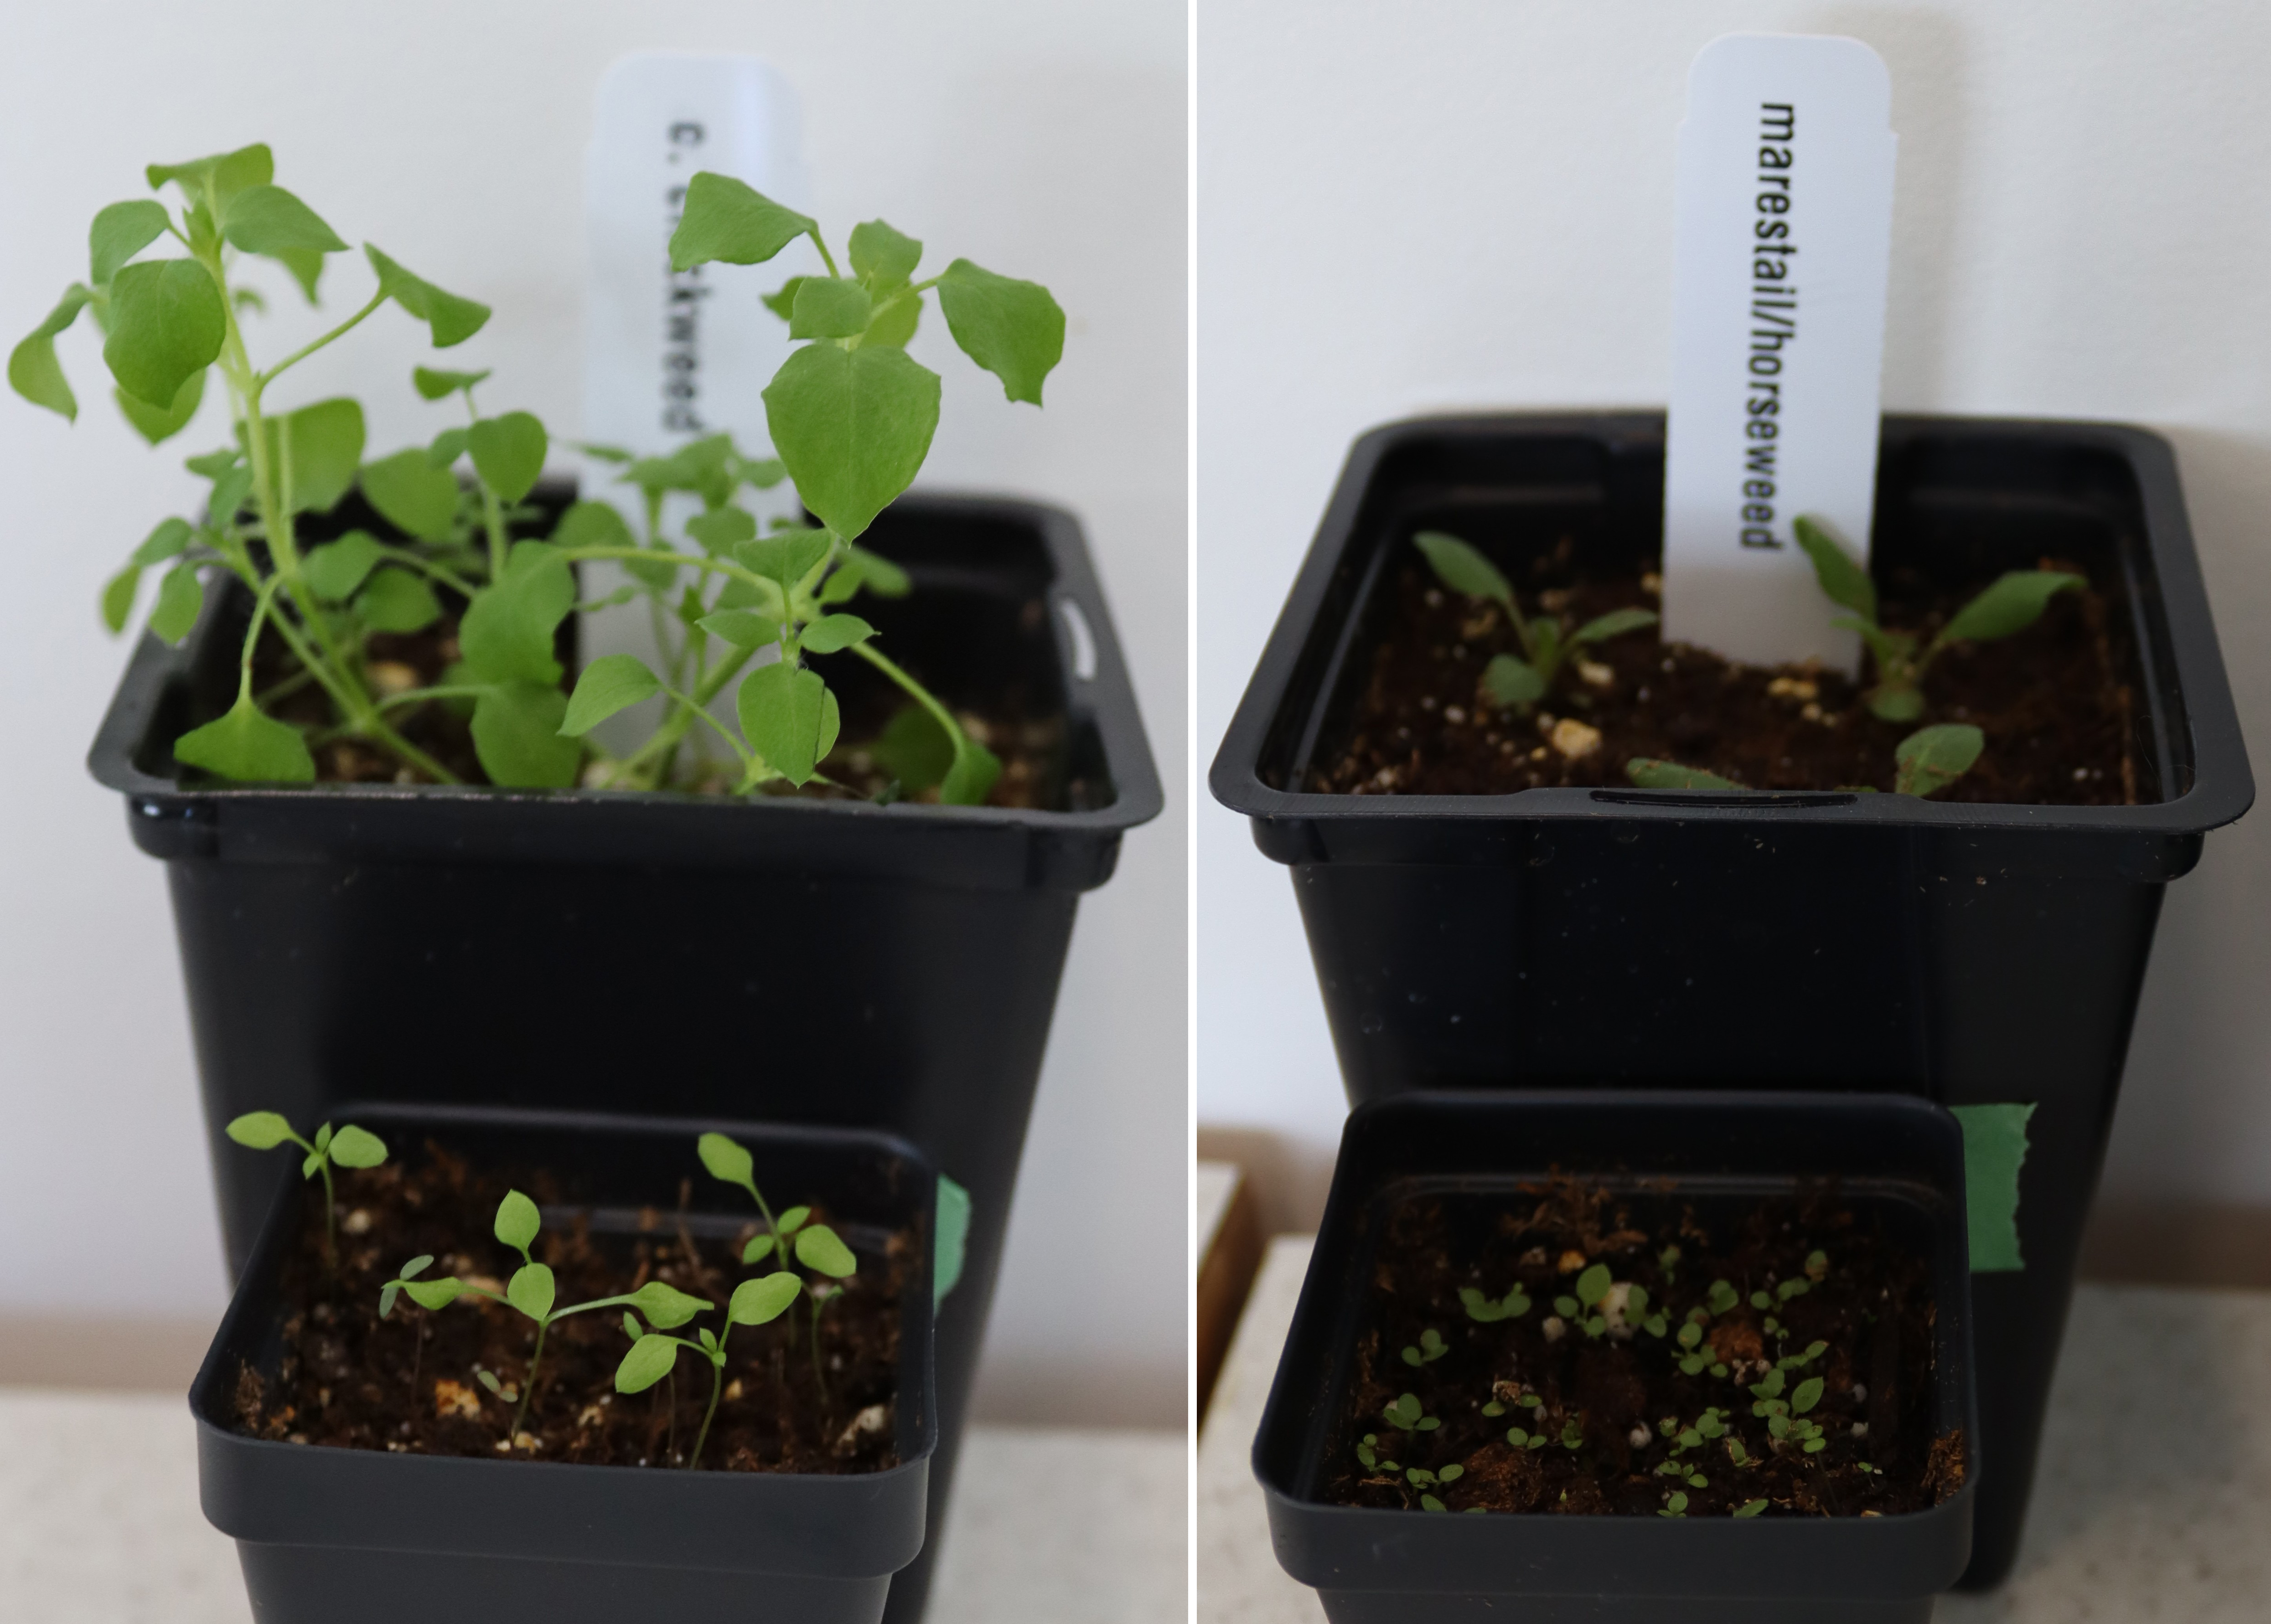
Early in the season, winter annual weeds will most likely be out in the field first as they follow the same life cycle as wheat. Some winter annuals include common chickweed, henbit, horseweed (marestail) and purple deadnettle. When trying to successfully control winter annual weeds, they must be actively growing but before they have set seed.
When should herbicide be applied for better efficacy?
A good rule to follow is to apply herbicides to wheat when the average temperature is 50 F and there has not been a frost in the past two days, nor is there frost forecasted for the next two days. If you can get wheat planted on time, you’ll have a window for herbicide application in the fall if you see weed pressure. This gets one more operation out of the way prior to spring and reduces risk for low temperature stress at time of application in the spring.
Before making herbicide applications, scout your fields to make sure winter annuals are starting to grow. Likely applications at greenup will be too early for good control. Consult Michigan State University Extension bulletin E434, Weed Control Guide for Field Crops, for more information.