Creating and Editing Registration Processes
 Print
Print Email
EmailHow to create and edit registration processes in Events Management System.
After you have created your event using a template or by duplicating another event, you will need to customize the registration forms to fit your event needs by updating the information within “Configure Registration Processes”.
1. On the event dashboard again, click on Configure Registration Processes.
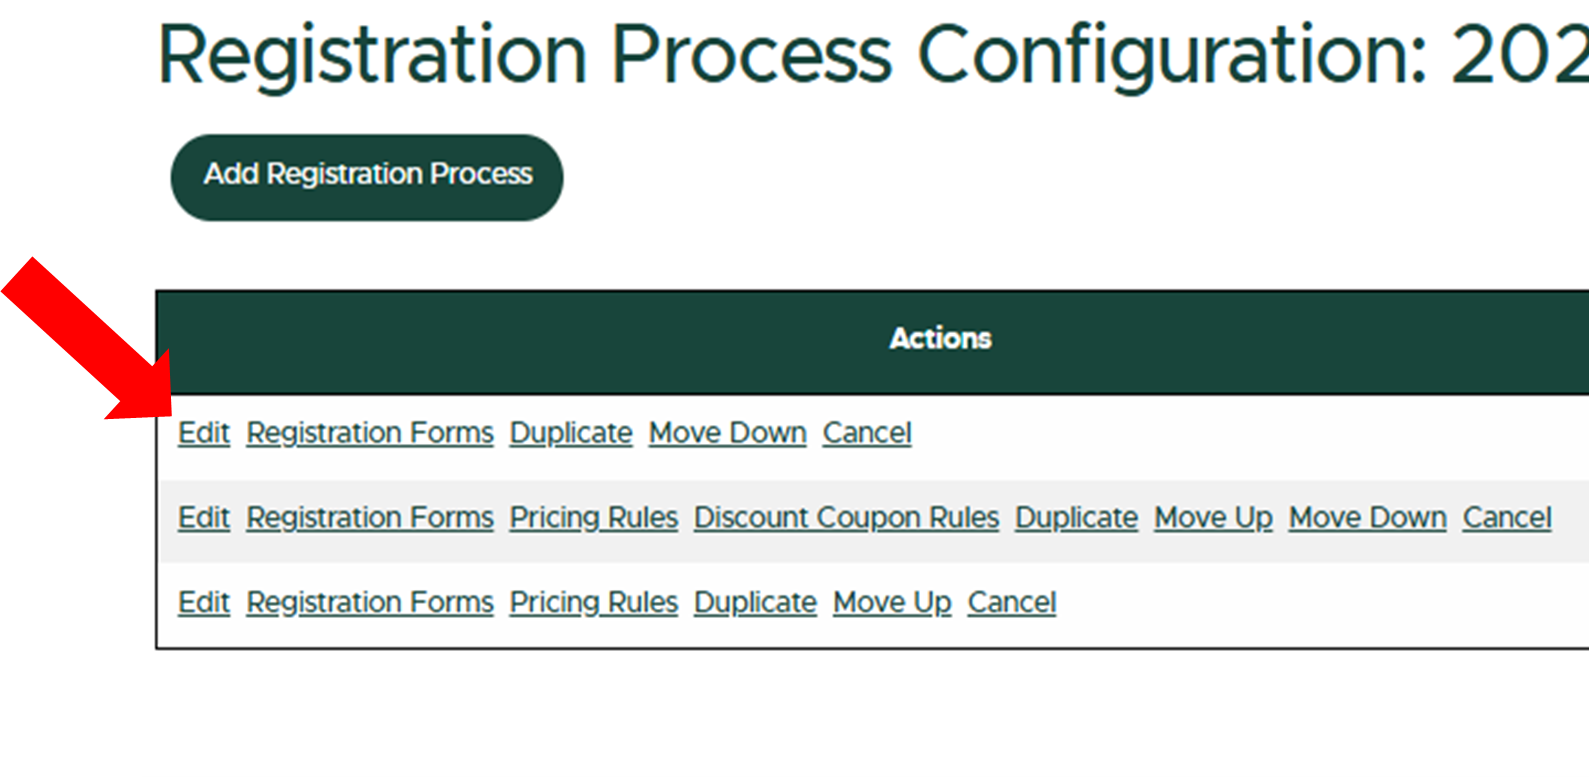
2. Click Edit, and review each tab within this section: Configuration Details, Look & Feel, Group Registration, Event Services Settings.
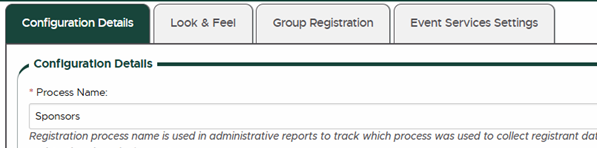
A. Configuration Details: This page is where you identify your process name (registration, speakers, youth, adults, etc.), registration button caption (register here, apply here, etc.), and the early, normal and ending registration dates. If your registration collects registration fees, you will also need to select the payment methods, cancellation fee and cancellation fee date.
TIP: If you do not have tiered registration pricing, the early and normal registration day should be the same date.
B. Look & Feel: This page is where you include any registration instructions and your event confirmation message.
C. Group Registration: If you are interested in using the group registration feature, please contact ANR Event Services at events@anr.msu.edu.
D. Event Services Settings: Identify the target audience role and age group for your civil rights data collection.
3. After updating all four tabs, click “Update Event” at the bottom of the screen.
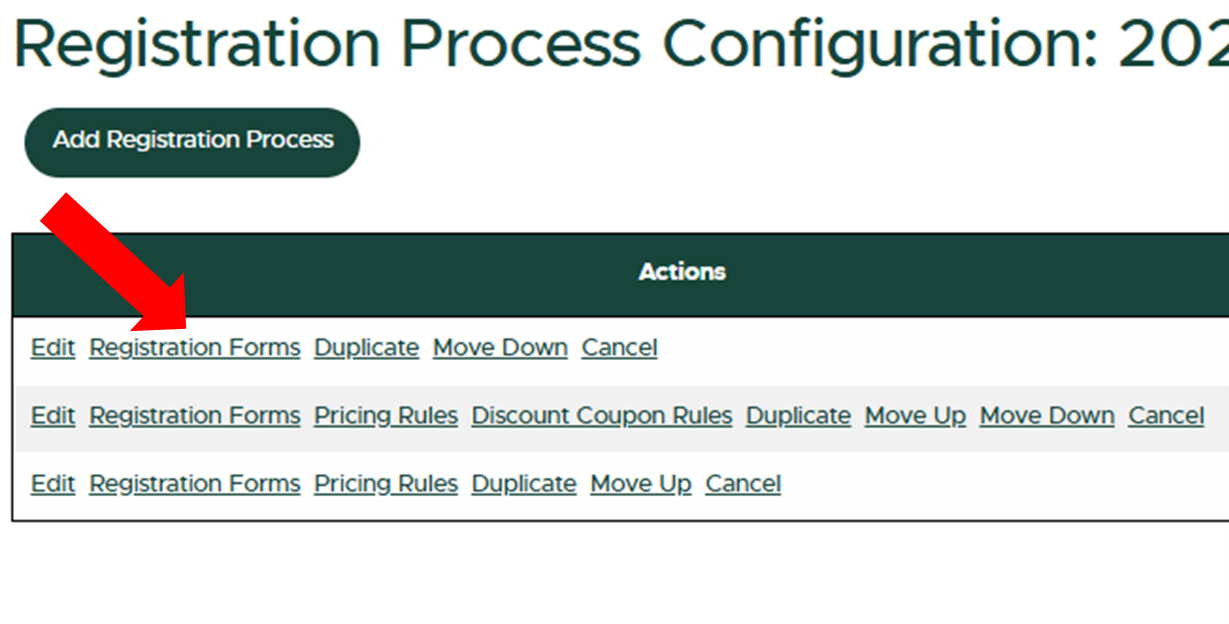
3. Next, click Registration Forms, then click Edit to view your registration form.
A. You can add, edit, move and delete sections, although it is recommended to leave the Name & Address sections to gather contact information from registrants.
TIP: Name, email and phone number MUST be included in your registration in case you need to contact registrants of any event changes.
B. Add a new fieldset by clicking “Add Section” at the top of the page.
C. Click “Add Fieldset” to add questions within the new section.
TIP: If you can’t add a specific fieldset template option, it is because the questions within that template are already being used within your registration form.
TIP: if you don’t know what template to use, then use the “Empty Fieldset”.
D. When you’re reading to edit the individual questions within a section of your registration form, click “Edit Fieldset”, then click on the Fieldset Inputs tab. An overview of the different question options is available here.
E. Click Update after each change to save your event. Avoid using the back button on your computer browser as it may not save your event changes.